Sugar Glider PVC Cage Write-Up By: Eric (AUtigers350z)
Supplies Needed: 9 - 10' long 1/2" PVC Pipe (Silver-Line) ~ $1.50/ea
8 - 1/2" PVC 90ş Elbow ~ $0.30/ea
19 - 1/2" PVC Tee Fitting ~ $0.30/ea
3 - 1/2" PVC Cross Fitting ~ $1.00/ea
4 - 1/2" PVC Cap ~ $0.10/ea
6 - 1/2" PVC 4-way Fitting ~ $1.40/ea **
4 - 1/2" PVC 3-way Fitting ~ $1.20/ea **
2 - Garden Plus hardware netting 36"x10' ~ $14.50/ea
1 - 500pk 8" Cable Ties (white) ~ $12.50
4 - 1/4 x 1 1/2" Bolts ~ $0.15/ea
4 - 1/4" Washers ~ $0.10
4 - 1/4" Nuts ~ $0.10/ea
2 - 1" Hook & Eye latch ~ $1.20/ea
Total Price : ~$83.50 + tax/shipping
** Had to order these parts online (littlegreenhouse.com was best price) due to the angles not being compliant with plumbing laws - therefore nowhere locally carried them.
- Purchased all of the items besides the one's with (**) at Lowe's. Make sure all the PVC fittings are slip fittings and not threaded!
Building Process: - Cut the PVC pipe into the following lengths:
20 - 15" pieces
17 - 12" pieces
4 - 29" pieces
4 - 10" pieces
4 - 18" pieces
4 - 8" pieces
1 - 36" piece
4 - 12.5" pieces
4 - 34" pieces
- Assemble frame according to the following diagram. Should be somewhat obvious by looking at the picture where the different fittings go..
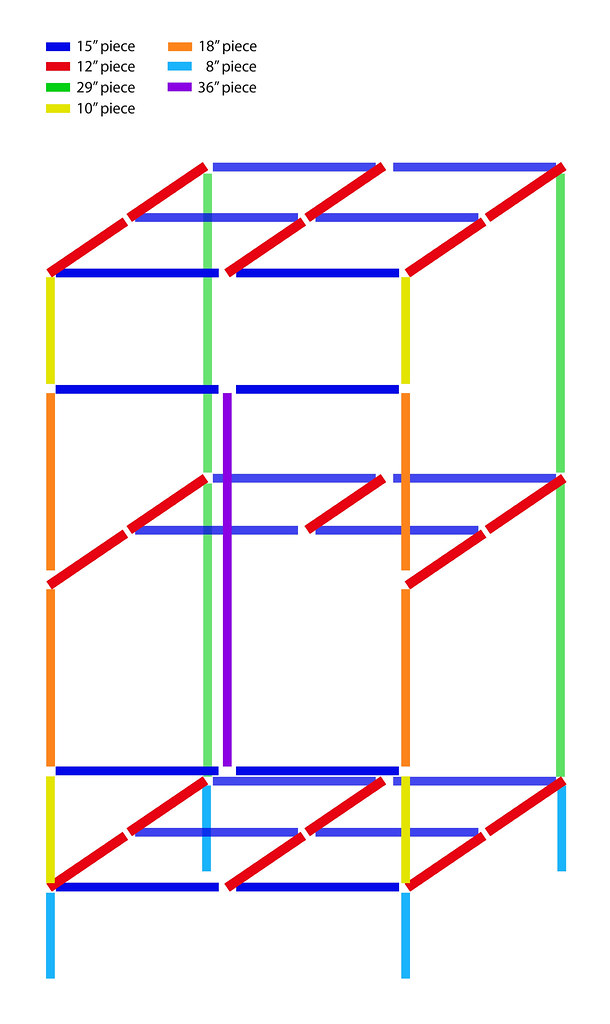
- Assemble the doors using the 12.5" and 34" pieces and the 90ş elbows.
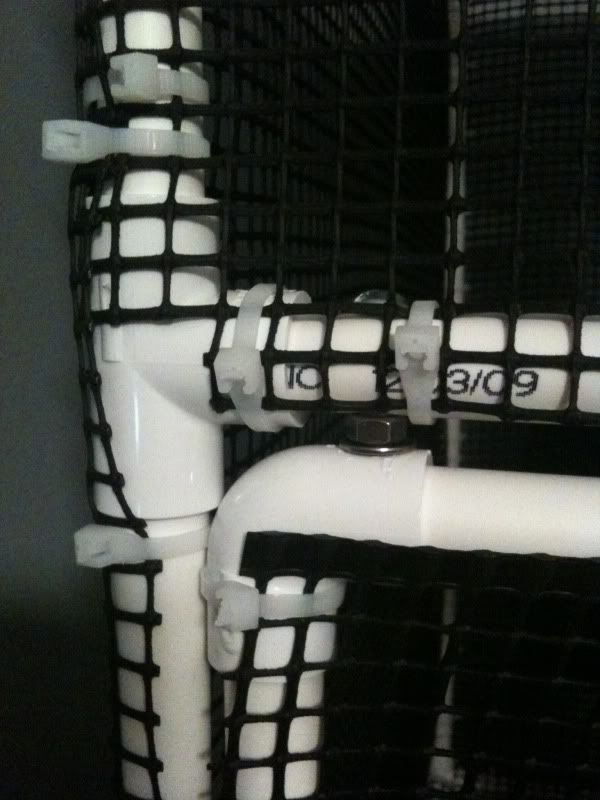
- Drill a hole through both walls of the PVC on the frame and one wall of the PVC on the door for each of the hinges (there are 4 hinges total, 2 on each door). Assemble based on the pictures below, using washers to take up space where needed. See pictures below for help..
Top Hinge:
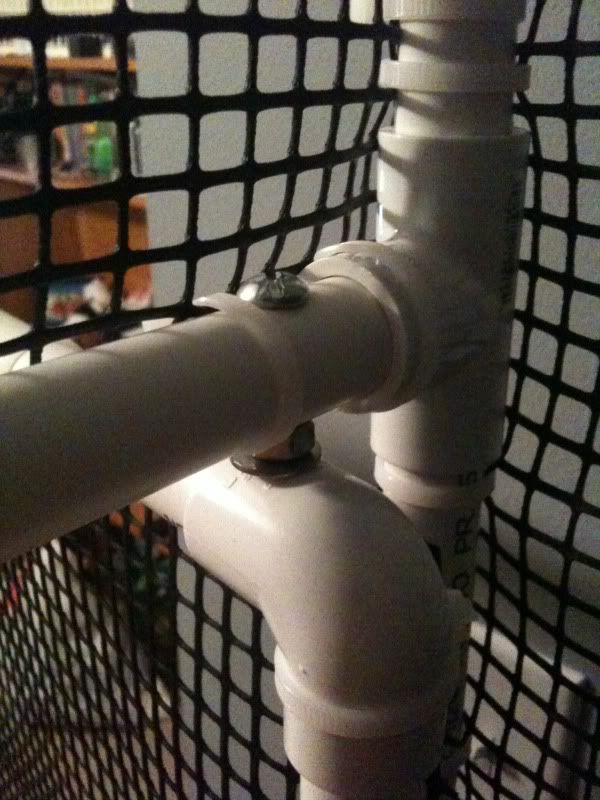
Bottom Hinge:
- Screw the hook & eye latches into the doors and middle PVC between the doors as demonstrated below..
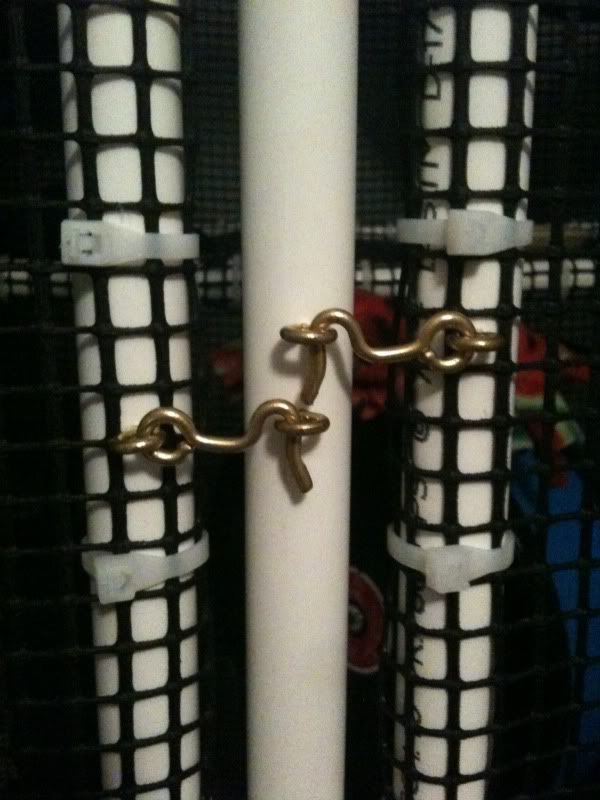
*I found that after the netting was tightly fastened to the frame and doors, it was rigid enough that only one set of hook & eye latches per door would be sufficient. However, if your gliders are escape artists or would like more security, you could install one set near the top and one near the bottom.
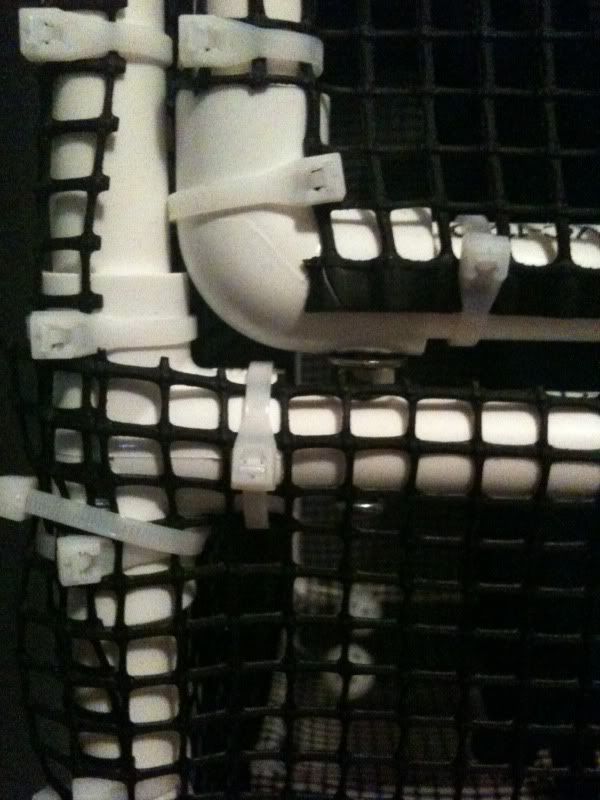
- Lay the hardware netting on the outsides of the assembled frame and fasten tightly with cable ties, removing excess with scissors. (Helps to go ahead and attach the netting onto the horizontal parts of the cage first [top, middle, bottom] with the netting facing the inside of the cage). Then fasten a sheet of netting to the outsides of each door using cable ties.
- At this point, you're basically finished with the cage. Make sure the ends are clipped on the cable ties and that nothing sharp is facing inward where the gliders could get injured.
Other things to note: - I bought (also from Lowe's) a 36"x30" appliance tray that fit perfectly under the cage to catch food, waste, etc.
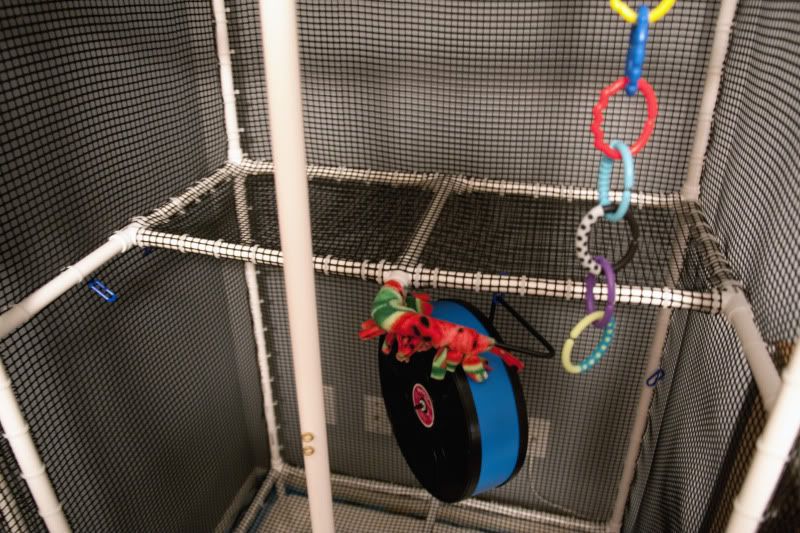
- On the middle level, there should be an empty hole in the cross fitting to add anything else you might want to get experimental with. I have my Wodent Wheel rigged to fit in there. You should have enough PVC left over to experiment with this a bit.
- Helps to use some sort of power/circular saw to cut the PVC to insure accurate length and smooth edges.
- After I finished cutting everything, I washed them off in the bathtub with hot water to clean them up and get the shavings off/out.
More pictures: Middle shelf - used for food/water dishes and somewhat of a waypoint for them to rest:
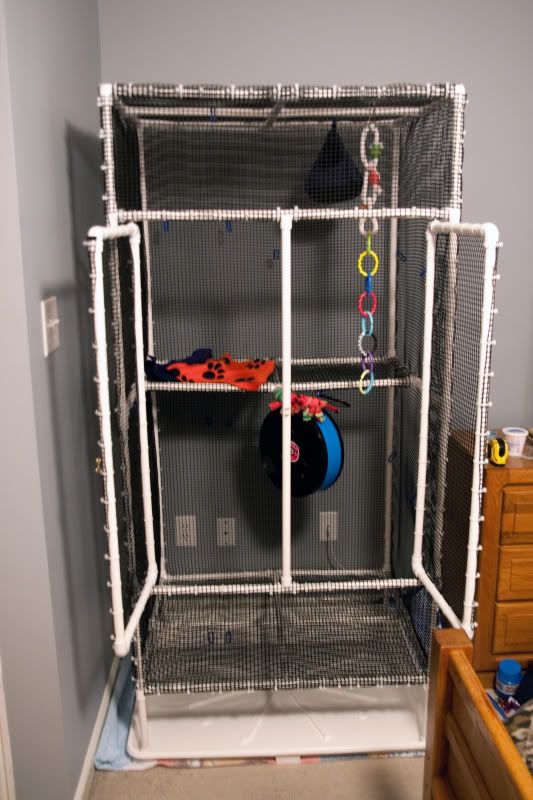
Finished picture of the cage:
If you have any questions, shoot me a PM :)
 Home
Home Glider Gossip
 Gliderpedia
 Journals
 Resources