Tortiebaby Glider   IL, USA
159 Posts IL, USA
159 Posts
I finally put together a tutorial for how to make the PVC cage I built:
http://justforfuzzies.com/Other_Stuff/Cage/index.html
It's still in the beginning stages, but I'll be taking pics when I build the other cages to make the tutorial easier to understand.
I had alot of people interested in how to build the cage, so hopefully this tutorial will help you guys out. ;)
If you have any questions, feel free to ask!
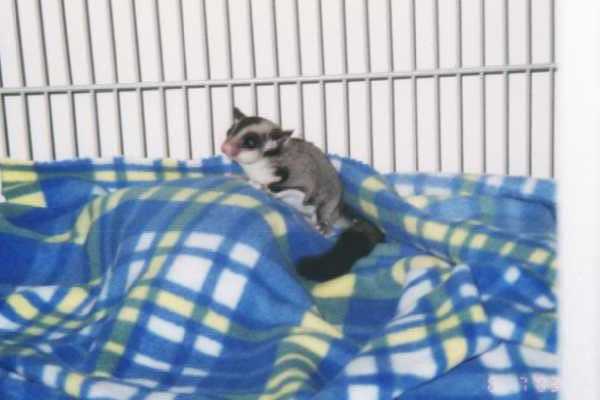
BTW, if you didn't see the cage I made, here's a pic of it(it doesn't have handles/latches in the pic):
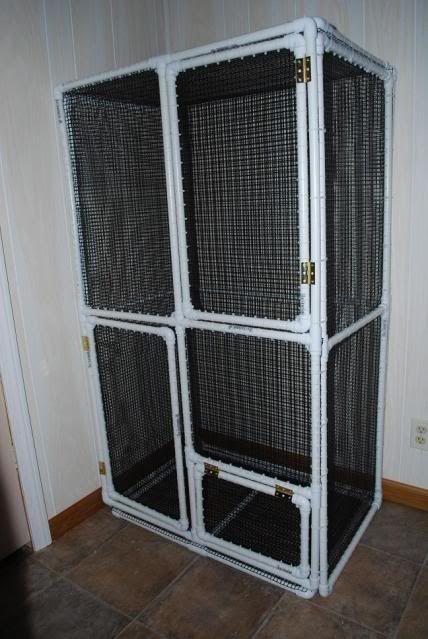
I hope you all find it helpful! I'd love to see pics that any of you build like it as well! I might make a picture section on my site for people to show of the ones they make. I might make a picture section on my site for people to show of the ones they make.
Tortiebaby Glider IL, USA 159 Posts Yeah, I used zip-ties for everything, lol. I'm going to be trying nuts and bolts once I can finally get to the store(it's been a crazy last couple weeks...) because I think they'd work better, make it easier to take apart, and would cost about the same as Zip-ties. They COULD chew out, if they really wanted to, but the mesh s the "bars" of the cage and it's not common for a glider to chew the bars. ;) I've currently got a colony of 3(and a joey) in the cage in the pic and a colony of 4 in the first cage I made. So far I've had no problems at all. The mesh doesn't even bend under the weight of 4 gliders in a pouch. It's tougher then it looks. Also, the cages are big enough and if they have plenty of toys then there's no reason why any glider would just sit there and start knawing on the mesh, lol. If they do, you can "patch" it or can simply use the coated metal mesh instead. ;)
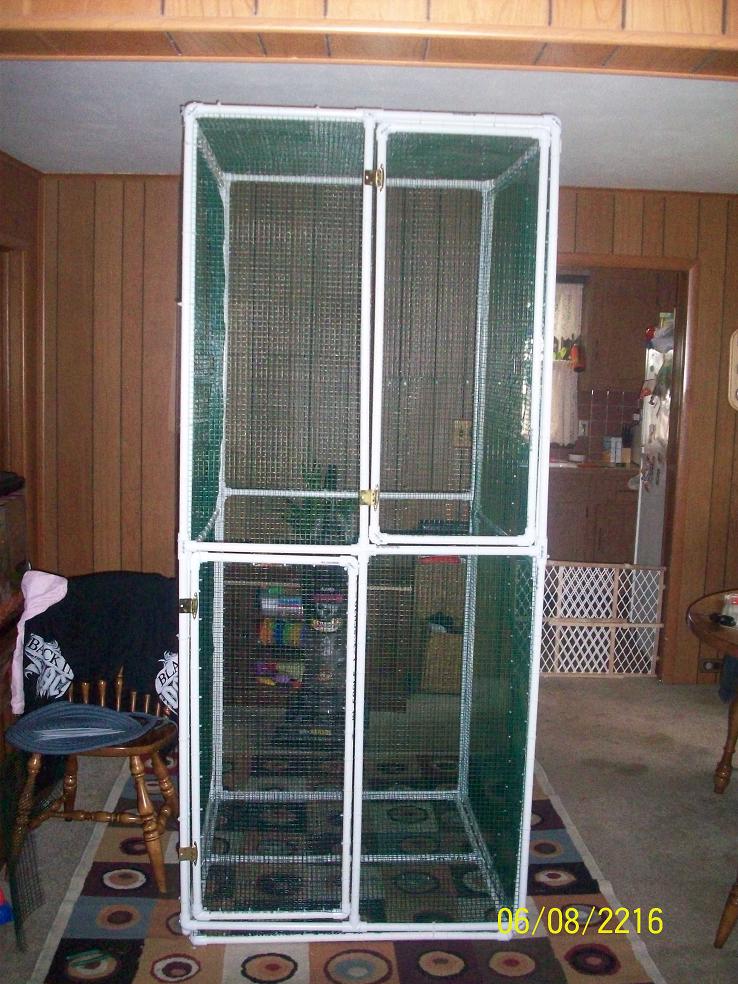
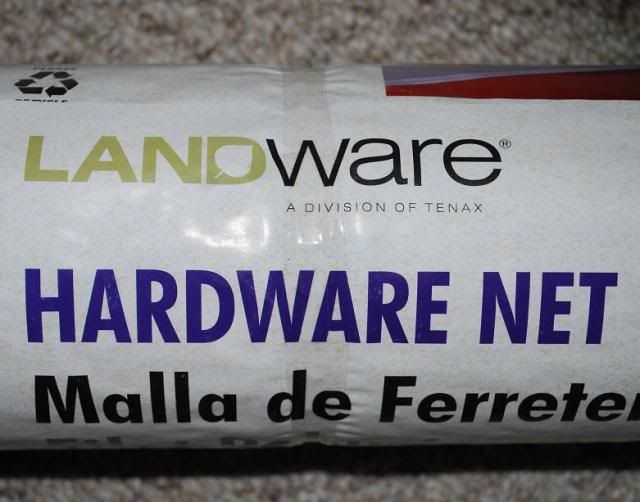
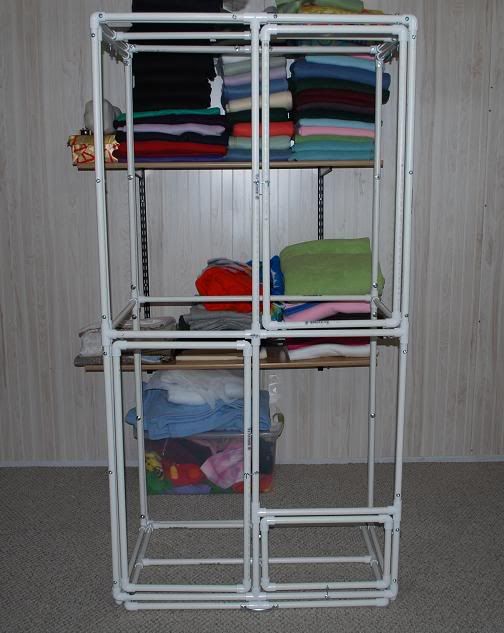
Some photos from our members kcopeland79 Joey TX, USA 19 Posts That is great! I can't wait to make one. How much did you spend making this? Tortiebaby Glider IL, USA 159 Posts Oh yeah, its' not the same as a rept. Compared to a reptarium this cage is: *Sturdier *Lasts longer(because you don't have to replace the entire cover if you get a hole in the mesh) *You can hang things(nowhere to hand stuff on a rept) *Fewer escapes because you have doors instead of one big front side that opens *It's cleaner for the gliders(the mesh is mre breathable and the bottom is mesh so they don't walk on their poo/pee *You can see and interact(give treats) with the gliders through the mesh, unlike with a rept *and, in my opinion, it looks nicer then a Reptarium Those are just a few things that come to the top of my head. ;) It's also lighter then a bird cage, so it's easier to clean. Also, to buy a cage of equal size would cost at LEAST twice as much! I have the bird.com cages and they're nice, but the paint chips off in places and rusts. So, that's another plus: it will never rust! :) kcopeland79 Joey TX, USA 19 Posts wow great! I am going to see if I can get one started! That is really nice! thank you for the infor! TnS_glider_luv Joey TX, USA 42 Posts I like the tutorial. May I suggest you use a more generic term for "Landware cloth"? I went to Home Depot and they had no idea what I was talking about until I showed them a picture. Apparently they don't carry that brand at my Home Depot or something. Tortiebaby Glider IL, USA 159 Posts Wow! That looks awesome! Great job! :D Yeah, I think I'm going to add a "hints and tips" section to my finalized tutorial: 1)use pliers for tightening the zip-ties and 2) use toenail clippers for snipping the "tails" off the zip-ties. The toenail clippers are curved, so they'll leave a nice, rounded cut rather then sharp corners(which will hurt like the dickens when you try and move the cage and accidentally grab one!). Oh yeah, I finished putting together the frame for a 6' cage. I'll cut/paste what I posted on a different forum so you guys can see it too. ;) Tortiebaby Glider IL, USA 159 Posts quote:
Okay, here are some pics... Let me know if I forgot to post pics of anything you guys specifically wanted to see.
*click pics to enlarge them*
Full view
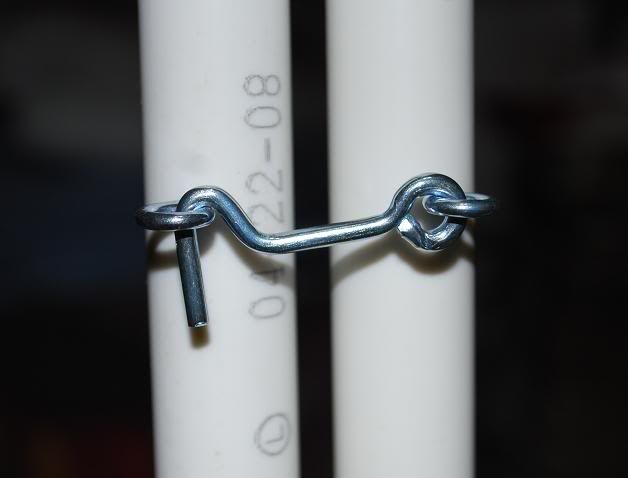
Hook and Eye Latches(I tried the spring-loaded ones and they were WAY too difficult to use, so I switched to 1 1/2" hook and eye latches that I got at Walmart)
Bottom Food Door
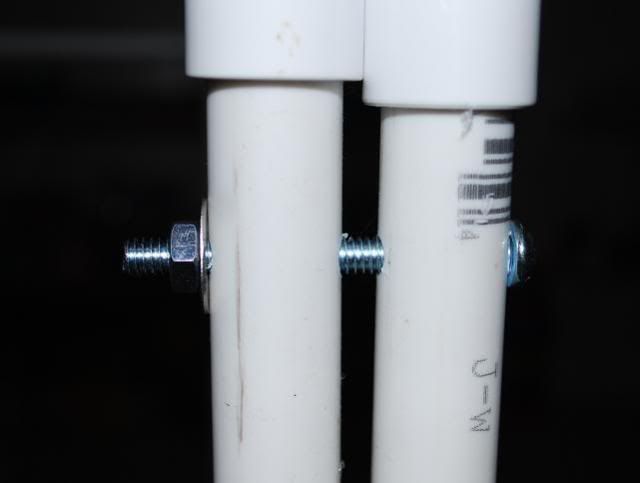
I used bolts and nuts to do the "hinges"
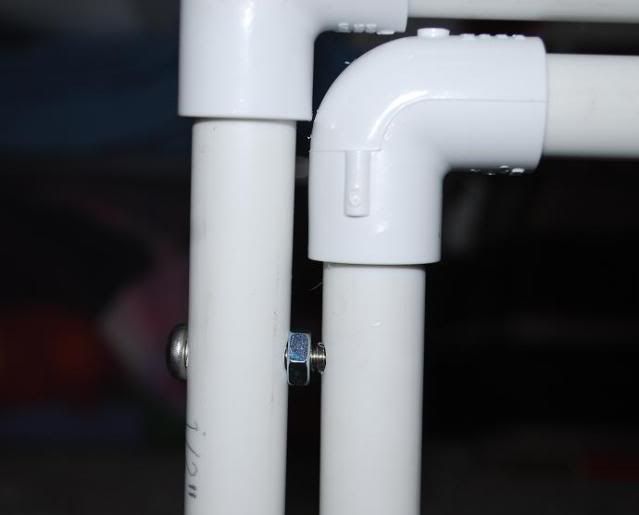
I used the same nut/bolt concept for the bigger doors as well, except for the bottom nut/bolt I had to add 2 washers on one of the doors to boost it up a little
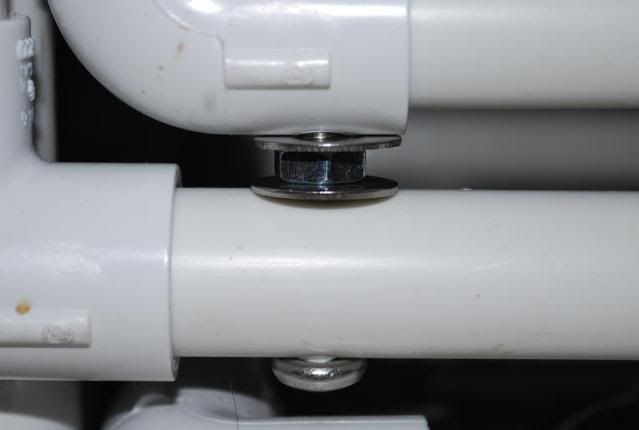
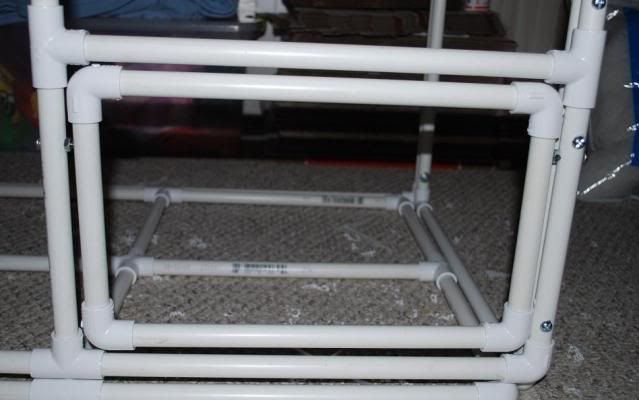
Rather then using large zip-ties to hold the cage panels together I used nuts/bolts/washers instead
Sooo...with the new cage I made it bigger, used nuts' bolts to hold it together, used simple hook and eye latches for the doors, and made the hinges with nuts and bolts, so that the doors don't sage over time, like with regular hinges. ;)
With this new design the doors will be better, the frame is a bit sturdier(although, at 6' tall, instead of 5', it's a little bit wobblier), and the cage will be just as easy to disassemble as a store-bought cage! :grin:
Hopefully the pics are helpful!
Once I get the landware cloth on the cage I'll be changing the tutorial to add pics. I'll also be adding the new measurements for a 6' cage in case anyone wants that size as well. Feel free to ask if you would like the measurements for a different-sized cage!
quote:
Oh yeah, and I also made the top and bottom with crossbars going both ways. It'll add additional support to the bottom and extra support for hanging things from the top as well(you can hand toys directly from the cloth or put eyes in the PVC for hanging stuff from. Either way, it should hold up much better then the original design.
CoffeeHead112 Joey 16 Posts I just finished mine 2 days ago. My only concern is that there is that the ends of the zip ties that I cut are kind of sharp, Should I take the time to move them all outwards so Dante doesn't get scratched or will he be fine with them? I kinda screwed up the drop pan thing cause the directions weren't really clear on that part but I moved the entire cage up onto a few wooden blocks and placed 1 underneath. And I think this cage will come in handy when I go and get Dante a friend, after the quarantine I can just split the cage in half with the extra hardwire net and place each suggie in a seperate half until they get used to each other. And oodles of thanks Tortiebaby, this saved me a ton of money and was a lot of fun to build. I am not the most mechanically inclined individual either and I found it very simple to make.
 |
New Message |
 |
|
. |
|
 Home
Home Glider Gossip
 Gliderpedia
 Journals
 Resources