LuckyGlider Zippy Glidershorts     TX, USA
5266 Posts TX, USA
5266 Posts
If you and your sugar gliders are fortunate, you will never need to use this information on fitting him or her with an e-collar (Elizabethan Collar). But you should have the materials on hand and understand how to do this becauses you can save your sugar glider's life by doing this.
There are several methods for making E-Collars, including a good one in the Gliderpedia here. This method is what we use at Lucky Glider Rescue & Sanctuary and it works well.
First, let's explore why a sugar glider would need to be fitted with an ecollar... Sugar Gliders, more so than many other animals, have a tendency to pick at themselves when they sense something is not right or if they have a cut or abrasion.
This is often the case after males are neutered. They will "go after" the wound by licking it, pulling at sutures, or tearing open the wound. Likewise, if a glider has an intestinal blockage or urinary tract infection, it will often tear at itself. Any small cut will often incite a sugar glider to over-groom itself.
It is therefore important for you to check on your sugar glider at least twice a day - in the morning and in the evening - to make sure there are not cuts, open sores, etc. Of course if you are playing with your sugar glider every day, it is pretty easy to do this.
The purpose of an E-Collar is to keep the glider from biting at itself. Sugar gliders hate having an E-Collar on, because they cannot feed themselves easily with it on and it can cause great frustration. After fitting your glider with an E-Collar, you may need to hold it for a while and reassure it. You may need to syringe feed the glider. After a few days, while the wound is healing, you your glider may settle down.
Keep in mind that if a sugar glider is tearing at itself and in need of an E-Collar, you need to get the glider to a vet so any dead flesh can be cleared away, and sutures can be stitched-in and antibiotics can be given. Do not just put the E-Collar on and think that's all you need to do. Gliders's sores become infected and often nectrotic VERY easily. So take the animal to a vet. Your vet may adise that you keep the E-Collar on your pet, or may fashion your glider with a professional one. Keep in mind these instructions are meant to be FIRST AID, and not a replacement for proper veterinary care. You very well may save your glider's life by administering this first aid so we encourage every glider owner to have the materials on hand.
We first learned the basics of E-Collars from Angie and Debbie at Hope for Gliders in Texas during our visits there as we were getting ready to open the Lucky Glider Rescue & Sanctuary. We have made a few small modifications, notably the use of a small plastic yogurt container lid. If you use the lid, you don't have to worry too much about the size or a template because it is already a perfect size and thickness.
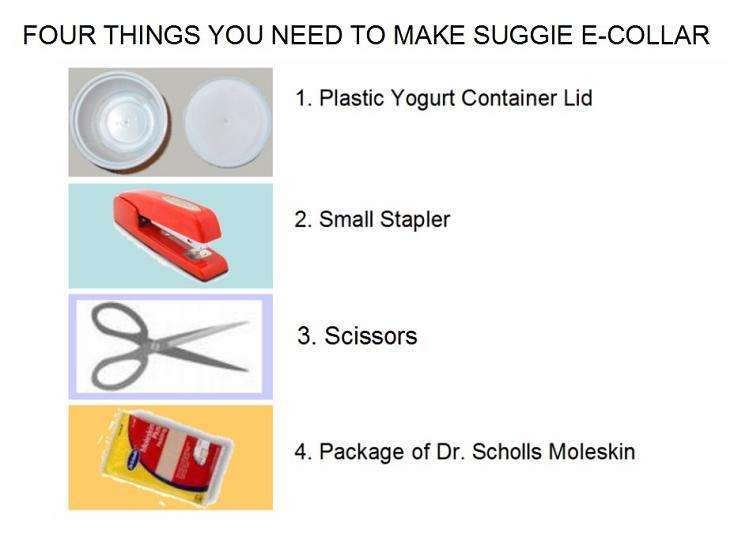
There are four things you need to make a suggie e-collar: A small plastic yogurt container lid; a small stapler; scissors, and Dr. Scholl's moleskin. You can get the moleskin at any pharmacy and mosts supermarkets. It's in the "footcare" section. Moleskin is a fuzzy, soft substance that comes with a sticky back, like pressure-sensitive tape.
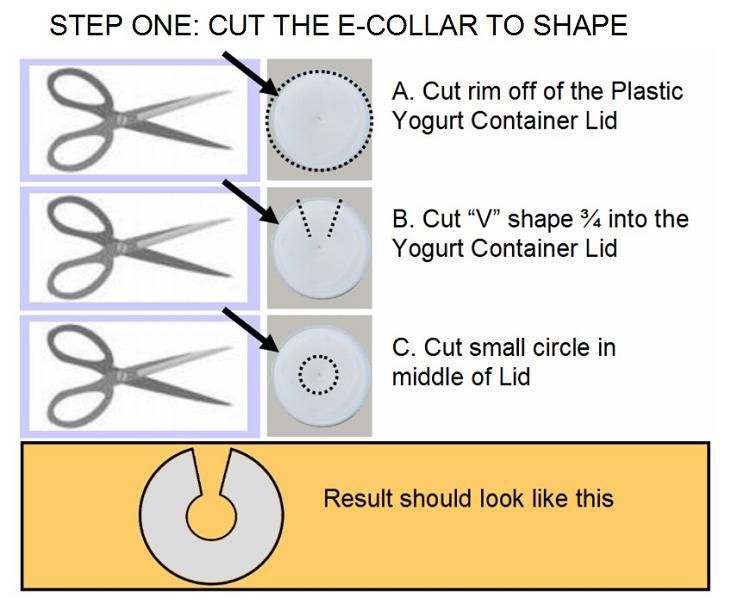
Step One: Cut the e-collar to shape.
First thing to do is to cut off the rim from the plastic yogurt container lid. That will make it more pliable and easier to fasten into a cone shape.
After trimming off the rim, cut a "V" shape about 3/4 way into the center of the lid. Then cut a circle in the middle. Be sure to trim off any sharp edges.
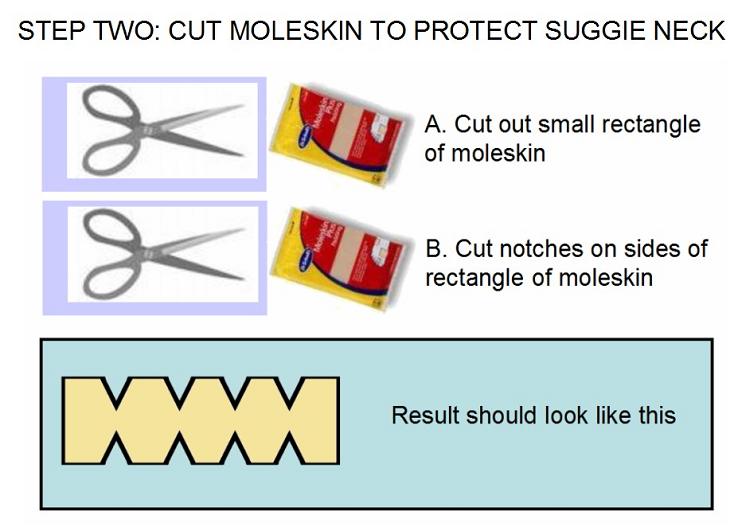
Step Two: Cut moleskin to protect suggie neck
Now cut a rectangle of moleskin and notch it along the edges so it will be easier to fold it around the inside circle of the lid you just cut.
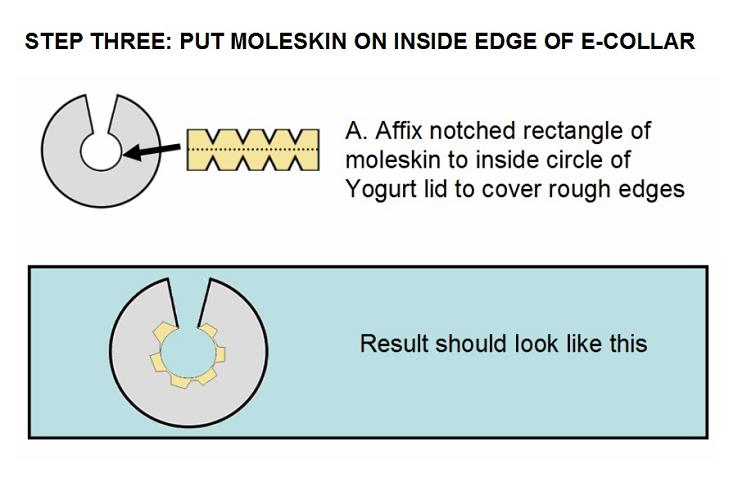
Step Three: Put Moleskin on inside edge of E-Collar
Once you have it to the correct size to stretch all the way around the inner circle, you take of the sticky-back and then fasten it to the lid so the little tabs overlap on both sides of the lid.
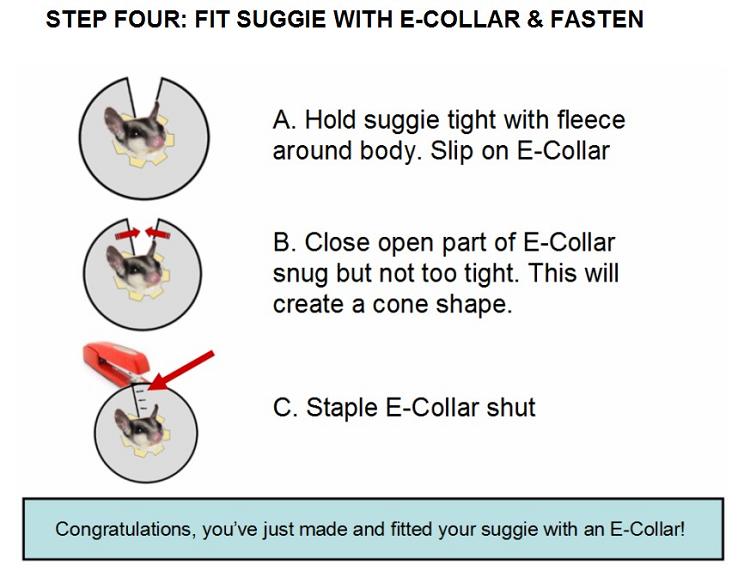
Step Four: Fit Suggie with E-Collar and Fasten
Now it's time to fasten the E-Collar around the neck of your sugar glider. It's a good idea to hold his body tightly but gently inside of a fleec with just the head poking out because he will not want to cooperate. Once you've slipped his head in the collar, gently move the open "V" shut and overlap the plastic so you can staple it in place. Don't make it too tight, because you don't want to choke the suggie or cut off air.
Be sure to take the collar off each day to clean it and inspect the glider for sores around the neck. Replace the moleskin if it gets too dirty or is no longer providing the soft cushion it's supposed to.
best_friendz2 Face Hugger 841 Posts best_friendz2 Face Hugger 841 Posts
 |
New Message |
 |
|
. |
|
 Home
Home Glider Gossip
 Gliderpedia
 Journals
 Resources
